I had this tutorial up over on The Paper Bakery blog yesterday. I love the look of folded ribbon and the ribbon that comes in the Bayside High kit is the perfect size to do this with.
Supplies you will need are ribbon (haha!) and some sort of adhesive that will hold well. I used some Glue Dots I had around, but you can also use liquid adhesive. If you choose to do liquid, it will take a longer, because of the drying time.

Step One:
Figure out how much of a tail you want to leave on the end and then fold your ribbon on top of it's self. Press really hard to make a good crease and then on the right side of the crease, closest to the tail you left, add your adhesive.
Step Two:
Fold your ribbon over on to your adhesive. It should look like the picture above. And you may want to put adhesive in the fold on the backside of your ribbon, depending on the weight of your ribbon.
Step Three:
Continue until you have done the length of ribbon that you need. You can keep the sizes of your folds uniform, or you can make some bigger, some smaller. It's your choice!
Step Four:
What your ribbon should look like when you look at the edge of it. Mine looks fairly neat and tidy because I kept the folds about the same size.
Step Five (not shown)
You can do this on a sewing machine by simply folding and sewing down the middle of the strip of ribbon. I choose to show this, since not everyone has a sewing machine.
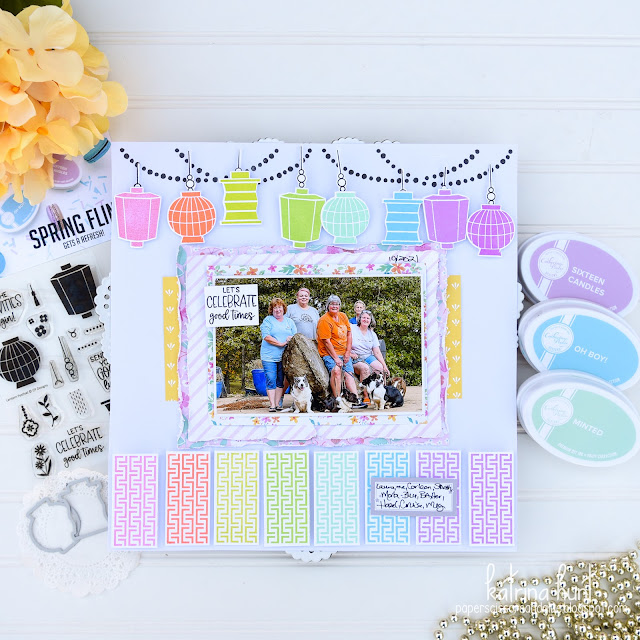
Now, let's see how I used that fun strip of ribbon on my page as an embellishment.

Supplies in the kits: Pattern Paper-Pretty Little Studio (Wild Berries *green & white text polka dot), Fancy Pants (Coral Corrugated/Trendsetter *black/white chevron), Echo Park (Here & Now *chalkboard quote and blue strip); Heidi Swapp (Serendipity-Singing Stripe *multi stripe/New Day *yellow background); Wooden Triangles-Studio Calico (Darling Dear); Chipboard Camera-Maya Road; Pink Banner Tag-Heidi Swapp (Color Pop Tags); Letters-American Crafts (chipboard), Basic Grey (green stickers); Tags-Elle's Studio (Beautiful Day/Date)
Supplies not in kit: Flair-The Paper Bakery (Elle's Studio Mash-up); Adhesive-Scotch, Fabri Tac, Scrapbook Adhesives; Letters-October Afternoon (orange a)
Silhouette Cameo with the following cut files
12 Arrows
Design ID# 20270
13 Arrows
Design ID# 21890
How cute is that ribbon strip? I accented it with one of the Maya Road chipboard cameras that come in "The MAX-Friends" album project kit. I also added a flair button from the Elle's Studio Mash Up flair set.

I love those chalkboard speech bubbles on the sheet of paper in the scrapbook kit. Great for accents to your page!

I went a little triangle crazy, but I love they way they look going down the page. I started with three, but then I just kept adding them! They are by Studio Calico and in the project kit this month.

July is just around the corner and new kits will be debuting soon. Make sure you don't miss out on getting one by signing up for a subscription. There are many options available.
And don't forget about the free cut files that are available right now! They were made by our very own Juliana Michaels!
Click HERE to get the files.


Love the pleated ribbon on this page, Katrina!!
ReplyDeleteI don't make cards myself,I do have a blog of Paper beads crafts though, but this is very detailed which I love, thank you for sharing, this is great :))
ReplyDelete